Setup Guide
Get started with SnapReceipt in minutes
Save Your Upload Link to Your Phone
One-tap access to upload receipts anytime
Watch: add SnapReceipt to your home screen
About 30 seconds, with voiceover. Turn your sound on.
Prefer pictures? The step-by-step guide is right below.
For iPhone (iOS)
Shown on the latest iOS. On older iPhones, the Share button (a square with an arrow) sits directly in the bottom bar — tap it and jump to step 4.
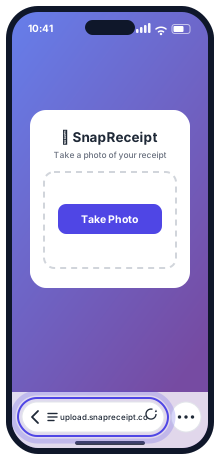
Open your upload link in Safari
Paste the link from your welcome email into Safari.
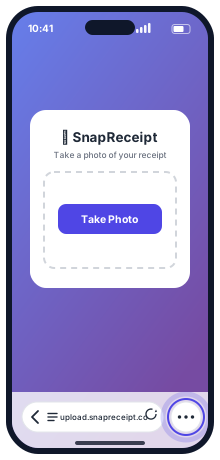
Tap the ⋯ button
Bottom-right corner of Safari.
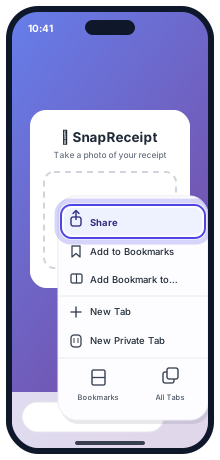
Tap "Share"
In the menu that pops up.
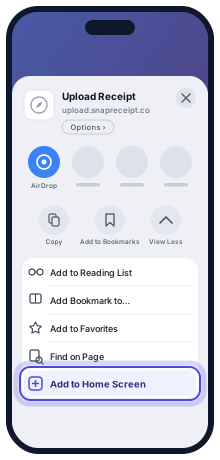
Tap "View More", then "Add to Home Screen"
It's at the bottom of the expanded list — on older iPhones, scroll down the share menu to find it.
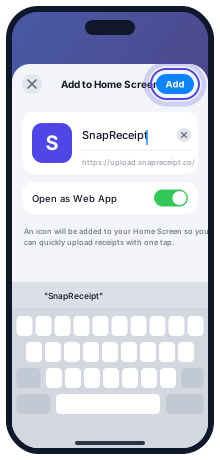
Tap "Add" in the top right
Keep the name or change it, and leave "Open as Web App" switched on.
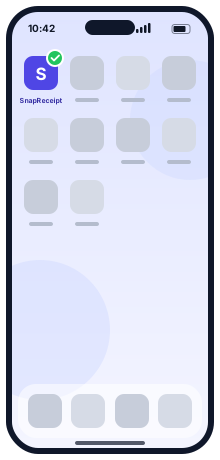
Done! SnapReceipt is now on your home screen
Tap the icon anytime — it opens straight to your camera.
For Android
Shown in Chrome 150 or newer. On older versions of Chrome, the menu item is called "Add to Home screen" — the steps after that are the same.
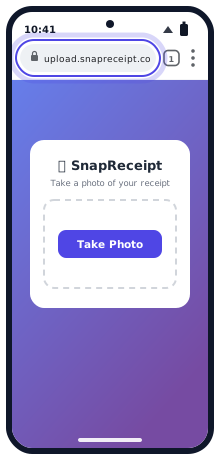
Open your upload link in Chrome
Paste the link from your welcome email into Chrome.
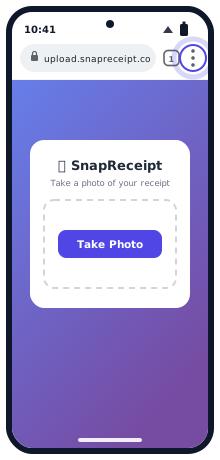
Tap the menu (three dots in top right)
Look for the three vertical dots in the top right corner of Chrome.
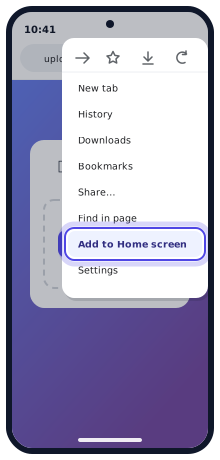
Tap "Install and create shortcut"
In the menu that opens. On older versions of Chrome this reads "Add to Home screen".
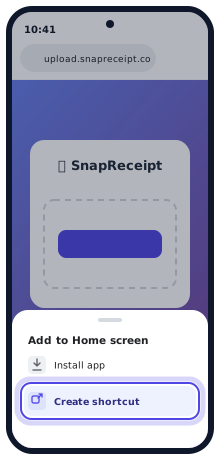
Tap "Install"
This puts SnapReceipt on your home screen as an app that opens full screen. (If you pick "Create shortcut" instead, you'll get a shortcut that opens inside Chrome — it still works.)
If asked to confirm, tap "Install" again
Some phones show one more prompt. If yours asks where to put the icon, choose "Add automatically".
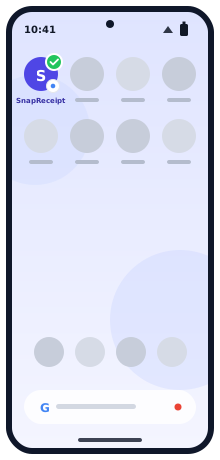
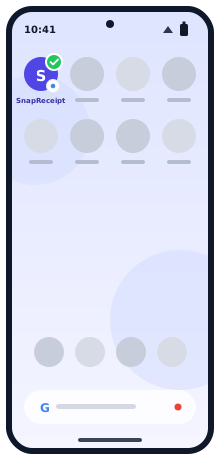
Done! SnapReceipt is now on your home screen
Tap the icon anytime — it opens straight to your camera.
Your First Receipt
Let's upload your first receipt together
Get a receipt ready
Grab any receipt you have handy — a coffee, lunch, or office supplies.

Take a clear photo
Good lighting, flat surface, whole receipt visible. Avoid shadows and glare.
Good: Flat, well-lit, entire receipt visible
Avoid: Blurry, shadows, cut off edges
Open SnapReceipt and upload
Tap the SnapReceipt icon on your home screen, then tap "Take Photo" — your camera opens right away.

Wait for the "Got it!" message
Processing usually takes a few seconds. You'll see a success message when it's done.

Got it! Your receipt is being processed.
Check your Google Sheet
Open your spreadsheet link (from your welcome email). Your receipt should appear in the current year's "Line Items" tab.
Email Forwarding (Bonus Method)
For digital receipts you receive by email
Your unique email address: Check your welcome email for your personal receipt email address (format: user-xxxxx@receipts.snapreceipt.co).
Receive a digital receipt by email
Online purchases, subscriptions, SaaS tools — anything that sends a receipt to your inbox.
Forward it to your SnapReceipt email
Just forward the email — we'll extract receipt images and PDF attachments automatically.
That's it!
The receipt will be processed and added to your spreadsheet automatically.
Pro tip: Save your SnapReceipt email address as a contact so it's easy to find when forwarding.
Understanding Your Spreadsheet
A quick tour of your expense tracking sheet
Tab 1 Welcome
Your account info, upload link, and receipt email address. A handy reference page.
Tab 2 2026 Line Items (or current year)
Every receipt, one row each. Columns include: Date, Merchant, Amount, Tax, Category, Sub-Category, Notes, and a link to the receipt image.
| Date | Merchant | Subtotal | Tax | Total | Category |
|---|---|---|---|---|---|
| 2026-02-20 | Staples | $45.00 | $5.85 | $50.85 | Office Expenses |
Tab 3 2026 Summary
Totals by category and sub-category, automatically calculated. Great for tax time!
New year? New tabs are created automatically when you upload your first receipt of the year.
Questions?
Check out our FAQ or contact support.